
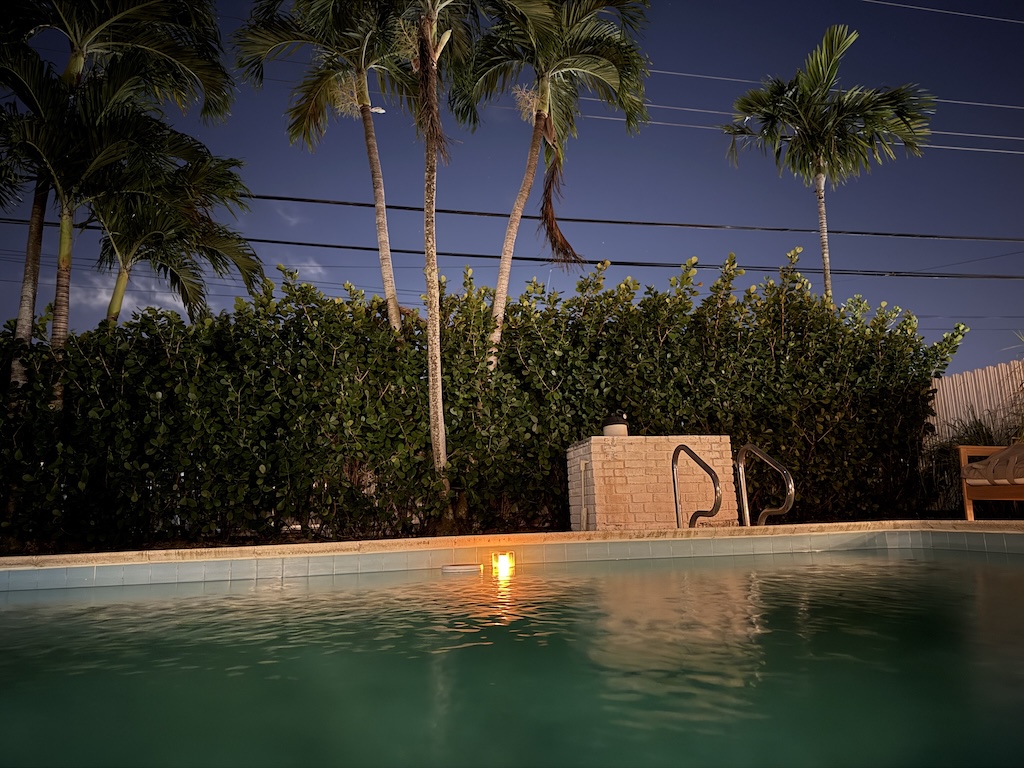
Ever stared at your dark backyard and thought, “I should really add some lights out here”? That was me last weekend. After watching countless YouTube videos and reading way too many reviews, I took the plunge with (Amazon affiliate links used) Wirefy’s 12/2 Low Voltage Landscape Wire. Here’s my real experience turning my thumb-twiddling anxiety into a successful DIY project! I had to hook this cable up…
Why I Chose This Wire
After my local hardware store quoted me an eye-watering price for their landscape wire, I did some digging and found this gem. What sold me:
- Perfect for us DIY newbies (seriously, it’s super flexible)
- Actually rated for burial (yes, you can dig it into your flower beds!)
- Tough enough to handle weather (goodbye, worry about rain)
- Works with all standard landscape lights, strong cover
- Won’t break the bank
Installation Adventure
Let me tell you, as someone who usually calls a professional to change a light bulb, this project was surprisingly doable! The wire was actually the easiest part:
- Strips clean without a fight (unlike my previous attempts with other wires)
- Flexible enough to route around my garden beds
- Tough enough that I didn’t worry about damaging it
- Worked perfectly with my connectors
Pro Tips From an Amateur 😭
Here’s what I learned the hard way, so you don’t have to:
- Buy more wire than you think you need (trust me on this one)
- Use waterproof connectors – regular electrical tape won’t cut it outside
- Leave some slack at each light connection (future-you will thank present-you)
- Mark your wire path before digging
My Setup Process
Here’s exactly what I did:
- Mapped my wire path with garden stakes
- Dug shallow trenches (I went very shallow, yes I was being lazy)
- Connected main run to transformer
- Added lights one by one, testing as I went, no risk of electrocution
Reorder Index: 9/10
Why so high? Because:
- Already ordered more for my front yard project
- Perfect for DIY skill level
- Durable enough to trust underground
- Actually easier to work with than expected
- Significantly cheaper than hardware store options
Result
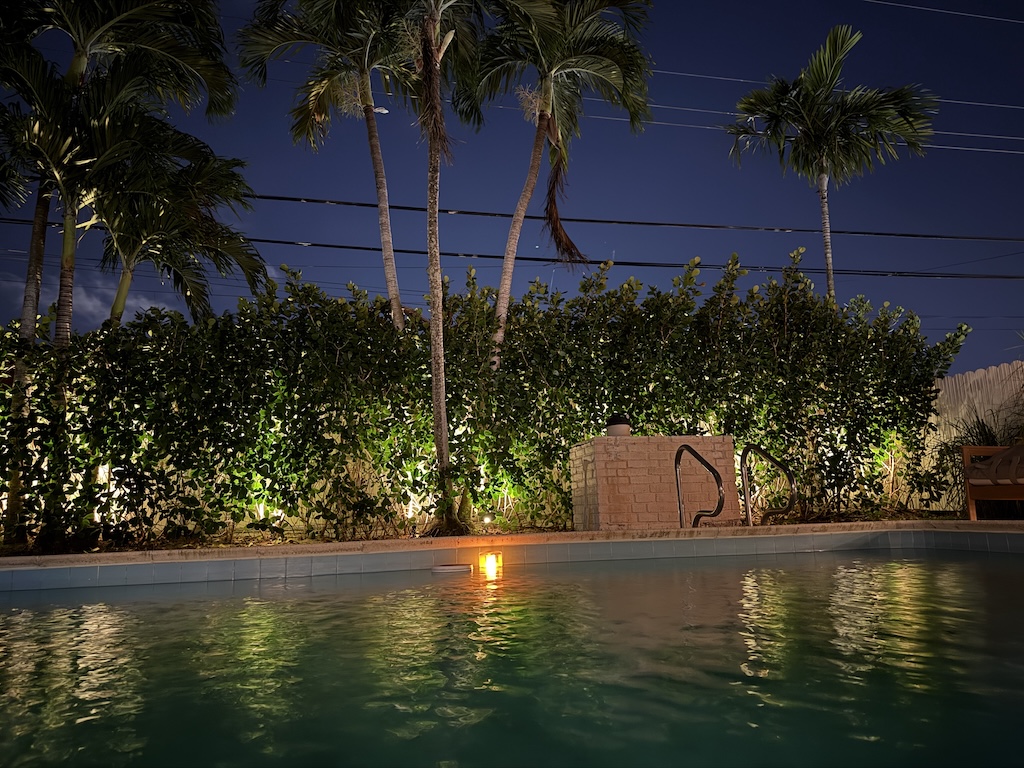
Wirefy’s Low Voltage Wire turned what could have been a frustrating DIY nightmare into a surprisingly smooth project. Even as a beginner, I managed to create a professional-looking lighting setup that’s still working perfectly weeks later.
Quick Tip: Start small! I began with just three lights and expanded once I got confident. The wire makes it super easy to add more lights later.
3 Month Update
I promised someone an update, and here it is! It’s been five months since I installed the Wirefy 12/2, and honestly, I was half-expecting something to fail by now in our intense Miami heat (humid too, remember?). But nope! Even after our typical afternoon thunderstorms and that week of relentless 95° sunshine, everything’s still working perfectly.
The wire insulation has held up without any signs of degradation from UV exposure, and I haven’t had a single connection failure despite the humidity. My electric bill barely budged too – maybe $3-4 more per month running the lights from dusk till 11pm every night.
Best part? Friends keep asking who I hired for the professional installation. Their faces when I say “I did it myself with my YouTuber cousin and a shovel” are priceless! 😂
Wirefy vs. Other Brands I Considered
Before settling on Wirefy, I actually ordered samples of two other wires (yes, you can do that!):
- Brand X Premium: Slightly thicker jacket but twice the price. Did I need military-grade wire for my South Florida landscape? Probably not.
- Hardware Store Generic: About the same price as Wirefy but felt noticeably stiffer and harder to work with, especially when weaving through my Clusia trees.
The Wirefy hit that sweet spot between quality and price. Its flexibility made all the difference when routing around my oddly-shaped garden beds and interleaving through foliage, and the copper conductors were actually thicker than the expensive brand, which surprised me.
My “Oops” Moments (So You Can Avoid Them)
Learning experiences, right? Here were my biggest facepalm moments:
- Ignoring voltage drop: My furthest light was dimmer than the others until I realized I needed to account for voltage drop over distance. Moving my transformer to a more central location fixed this instantly.
- Underestimating Miami rainstorms: I had one connector that wasn’t fully weatherproofed. After our first typical afternoon deluge, I found it submerged in a puddle. Surprisingly, it still worked, but I properly sealed it anyway.
The “Miami Method” of Installation
Let’s be honest about how I actually installed this wire:
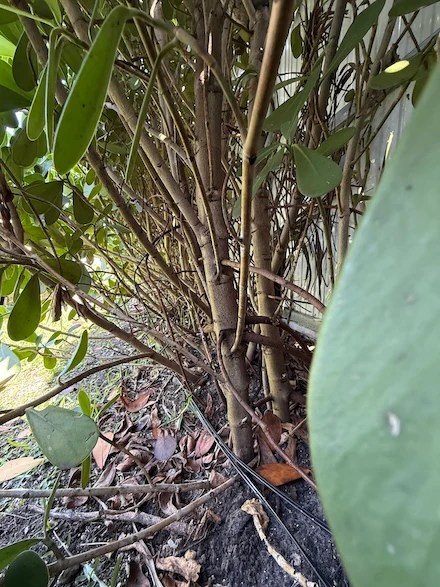
- Minimal burying: The package says 6 inches deep, but in reality? I went about 1-2 inches in most places, and in some spots just laid it on the ground and covered with mulch. Five months later: still working perfectly.
- Hook and weave technique: Instead of proper trenching in some areas, I used landscape hooks to secure the wire and weaved it through my Clusia trees. The flexibility of the Wirefy made this so much easier than it would have been with stiffer wire.
- Hurricane prep: We had one tropical storm warning, so I quickly checked all my connections beforehand. The wire was secure enough that I didn’t worry about it becoming a hazard.
- Heat adaptation: In the sunniest spots, I made sure to give the wire some slack rather than pulling it tight. This accounts for any expansion in our brutal summer heat.
Quick Answers to Questions I’ve Received
Since posting about this backyard string lights diy project, I’ve gotten several questions that might help you too:
Q: “How is the wire holding up in the Miami sun like my step ladder?” Surprisingly well! After 3 months of relentless UV exposure, the jacket still looks new where it’s visible. No cracking or color fading.
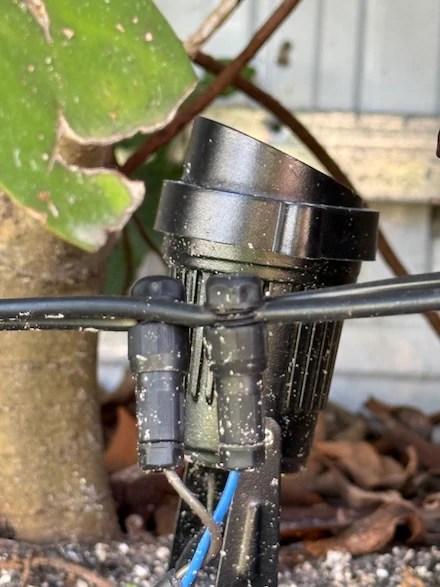
Q: “Did you need special tools to strip the Wirefy wire?” Nope! Standard wire strippers worked perfectly. The insulation came off clean without damaging the copper inside.
Q: “How deep did you ACTUALLY bury it?” Officially you should go 6 inches deep… I went about 1-2 inches in most places, and some sections aren’t buried at all – just secured with hooks and hidden in the Clusia. Not recommended by professionals, but it’s working fine in my yard!
Q: “Would this work for pool lighting?” It’s rated for direct burial and outdoor use, but I’d check local Miami-Dade codes for pool requirements. South Florida has specific rules for wiring near water features.
Exact Supplies That Made This Easier
A few specific products made this project so much smoother in our Miami climate:
- UV-resistant zip ties: Used these along with hooks to secure wire to the Clusias. They haven’t brittled in the sun yet.
- Weatherproof wire nuts: The ones with the silicone inside were worth the extra few dollars – zero moisture issues even after our afternoon downpours.
- Wire staples: Used these to secure the wire where it runs against the house. Much cleaner than the electrical tape I initially tried.
- Digital multimeter: Borrowed this from a neighbor to test voltage at each light. Helped identify one bad connector before it became a problem.
Updated: 05/16/2025
Added 3 month use impressions and questions.
Disclaimer: While I’m thrilled with my results, remember that electrical projects should always follow local codes. When in doubt, consult a professional!
Also, Wirefy is not my sponsor and my horrible install job should not reflect on them 🙏, thank you for reading 🙂
💡 Planning your own backyard lighting project?

Leave a comment